Video
Fluentos allows you to add a video widget to your campaign to drive engagement and stir excitement among your users. Shared below are the steps on how to add one, and how can it be configured to meet your requirements.
Steps to add a Video
Section titled “Steps to add a Video”-
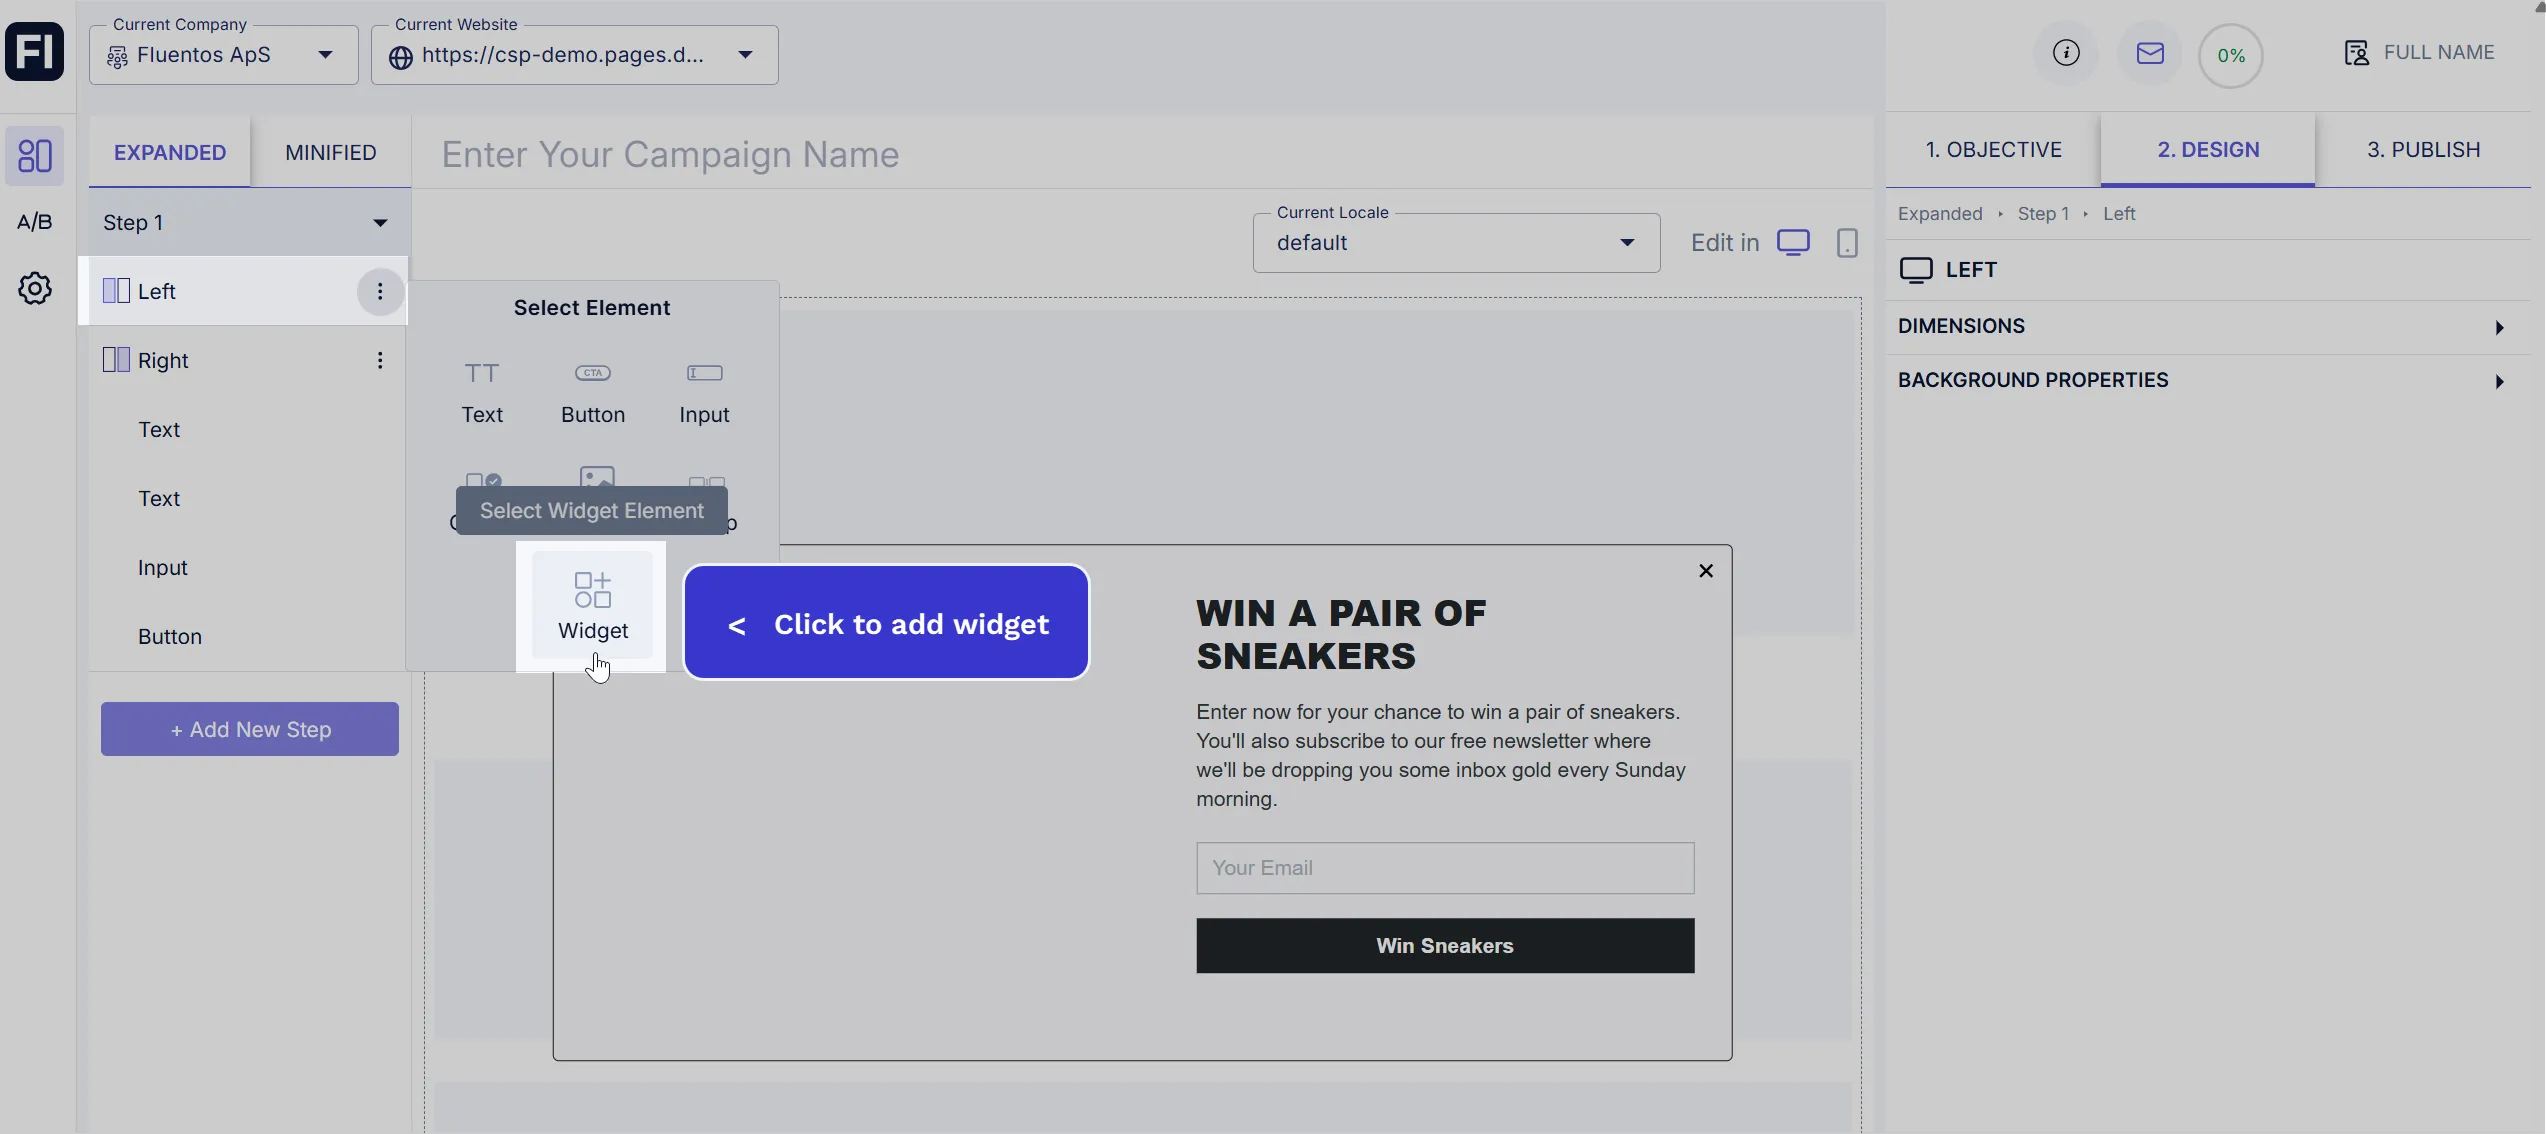
Add a widget to your campaign step by clicking on the three dots next to the container name (left/right/column) and selecting the Widget option from the available elements.
-
When the Widget element is added, use the dropdown and select Video in the right panel.

-
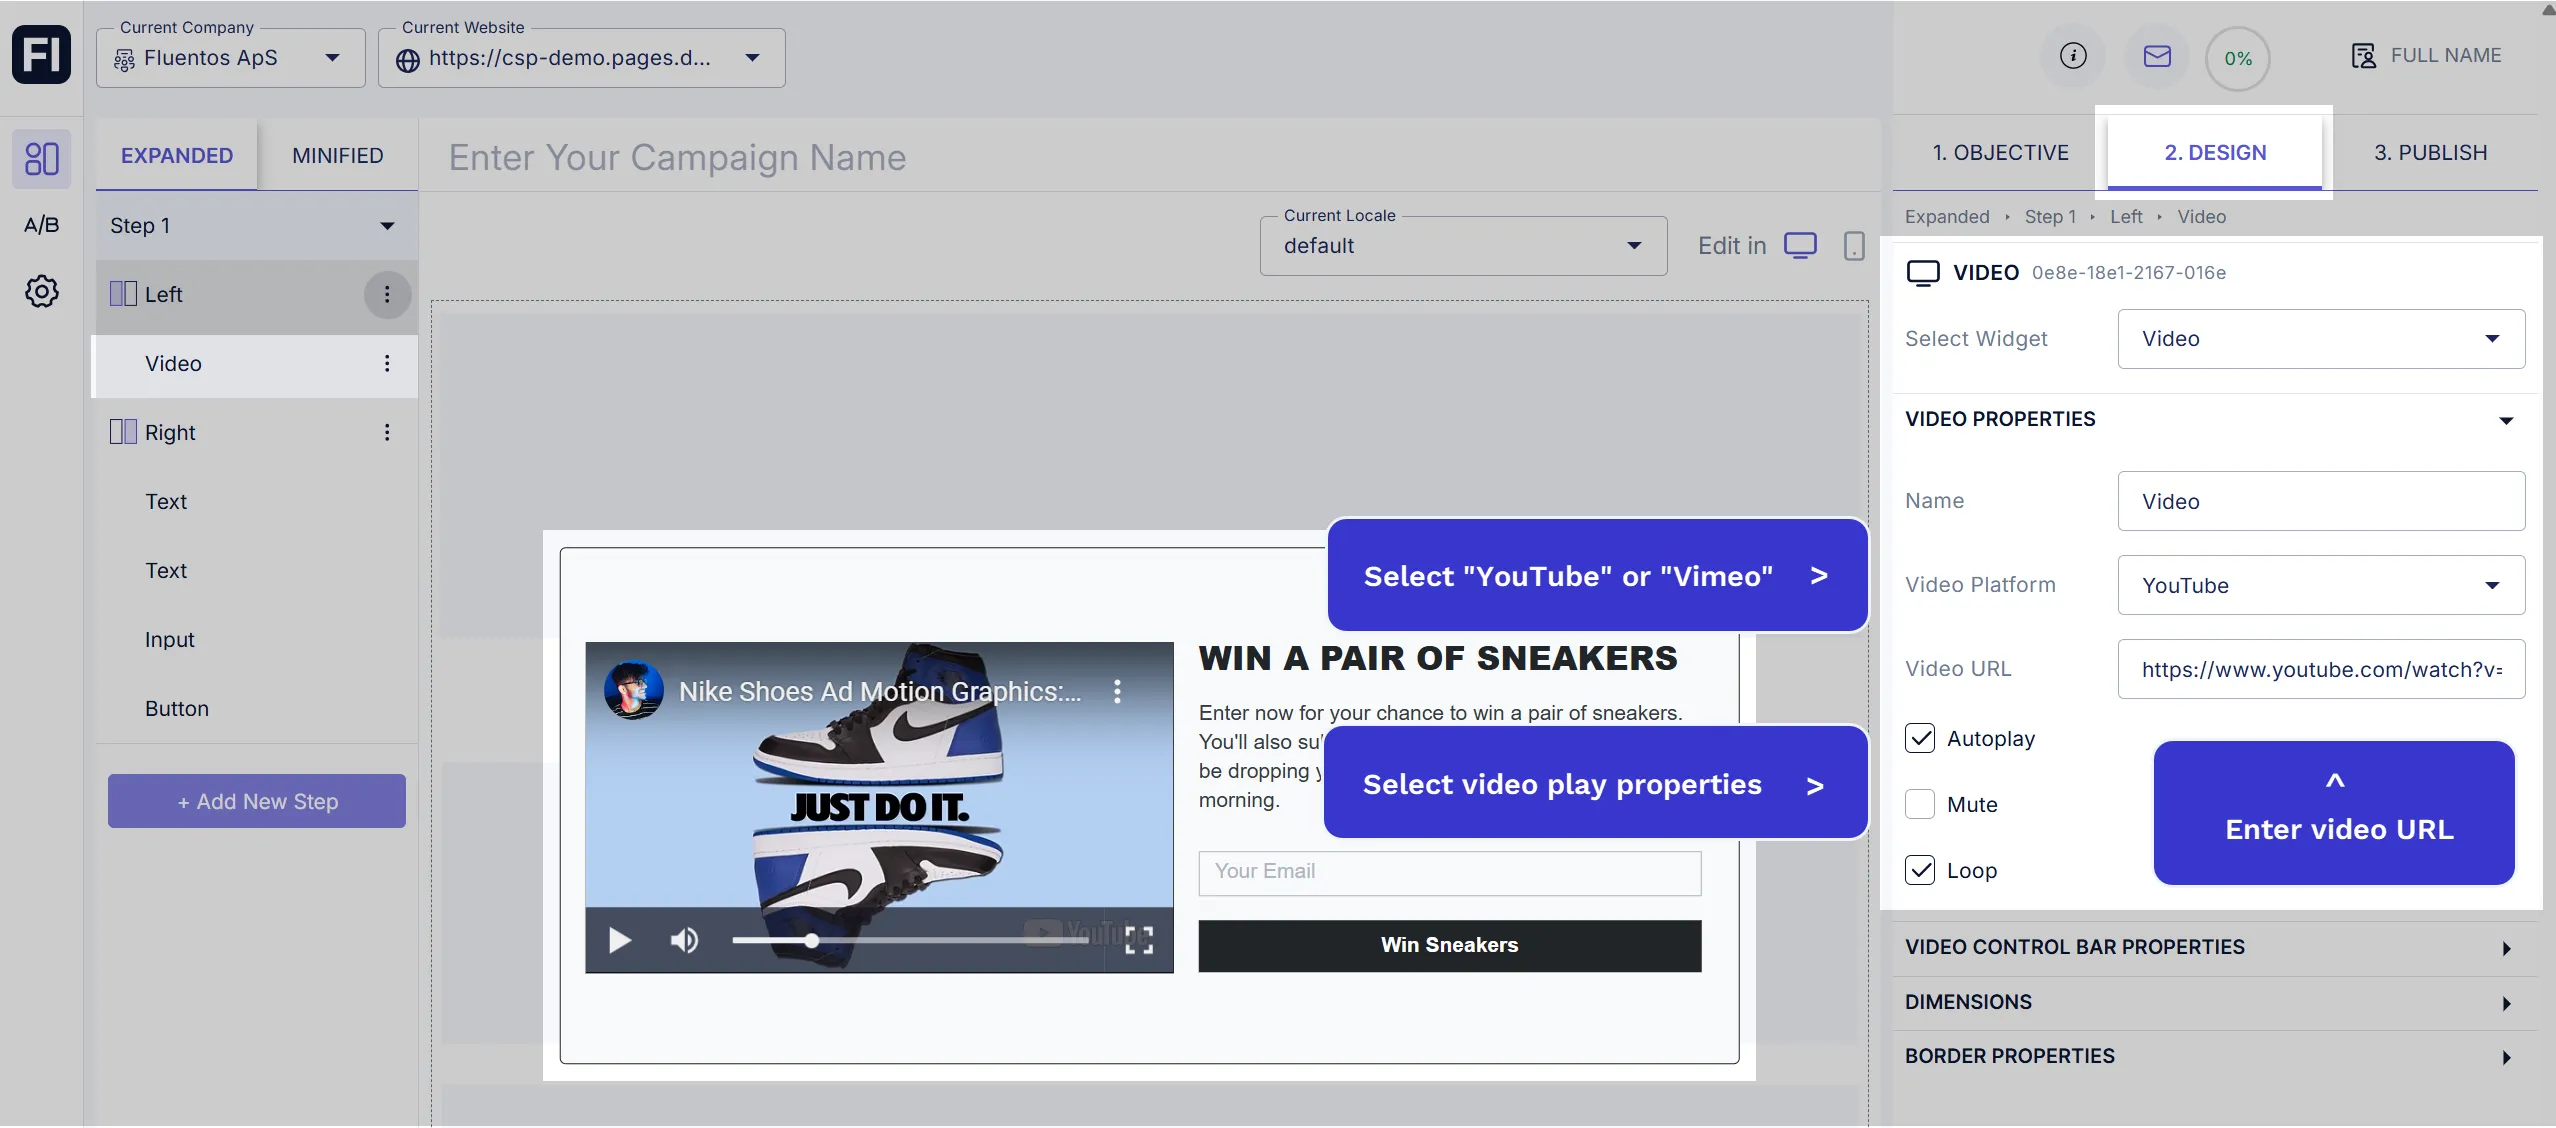
The Video will be added to your layout section. Its default name will be “Video,” which you can change. The following basic video properties will also be enabled for you to edit:
-
Video Platform: Since YouTube and Vimeo video URLs are supported, you need to select one of these options.
-
Video URL: Enter a valid video URL. Please ensure that you add the URL of the same platform which you selected above.
-
Video play options: Checkmark the following checkboxes as per your preference.
Autoplay: If checked, it will autoplay the video when the campaign appears on the webpage.Mute: If checked, it will play the video without sound.Loop: If checked, it will automatically restart the video as long as the campaign widget keeps appearing on the webpage.
Video Control Bar Properties
Section titled “Video Control Bar Properties”Once your video is added, you can decide which control bar options should be visible to the user. Simply check the boxes next to the features you want to enable:
Show Play Button: Allows the user to play or pause the video.Show Mute Button: Allows the user to mute or unmute the video.Show Time Range: Enables the user to seek forward or backward within the video.Show Full Screen Button: Allows the user to view the video in full-screen mode.

Dimensions
Section titled “Dimensions”You can customize the dimensions and placement of the video using the following options:
- Aspect Ratio: Use this option to define the width-to-height ratio of the video frame for proper scaling and display.
- Outer Space: Adjusts the spacing between the video frame and its container’s edges, helping you position it accurately in relation to other elements within the same container.

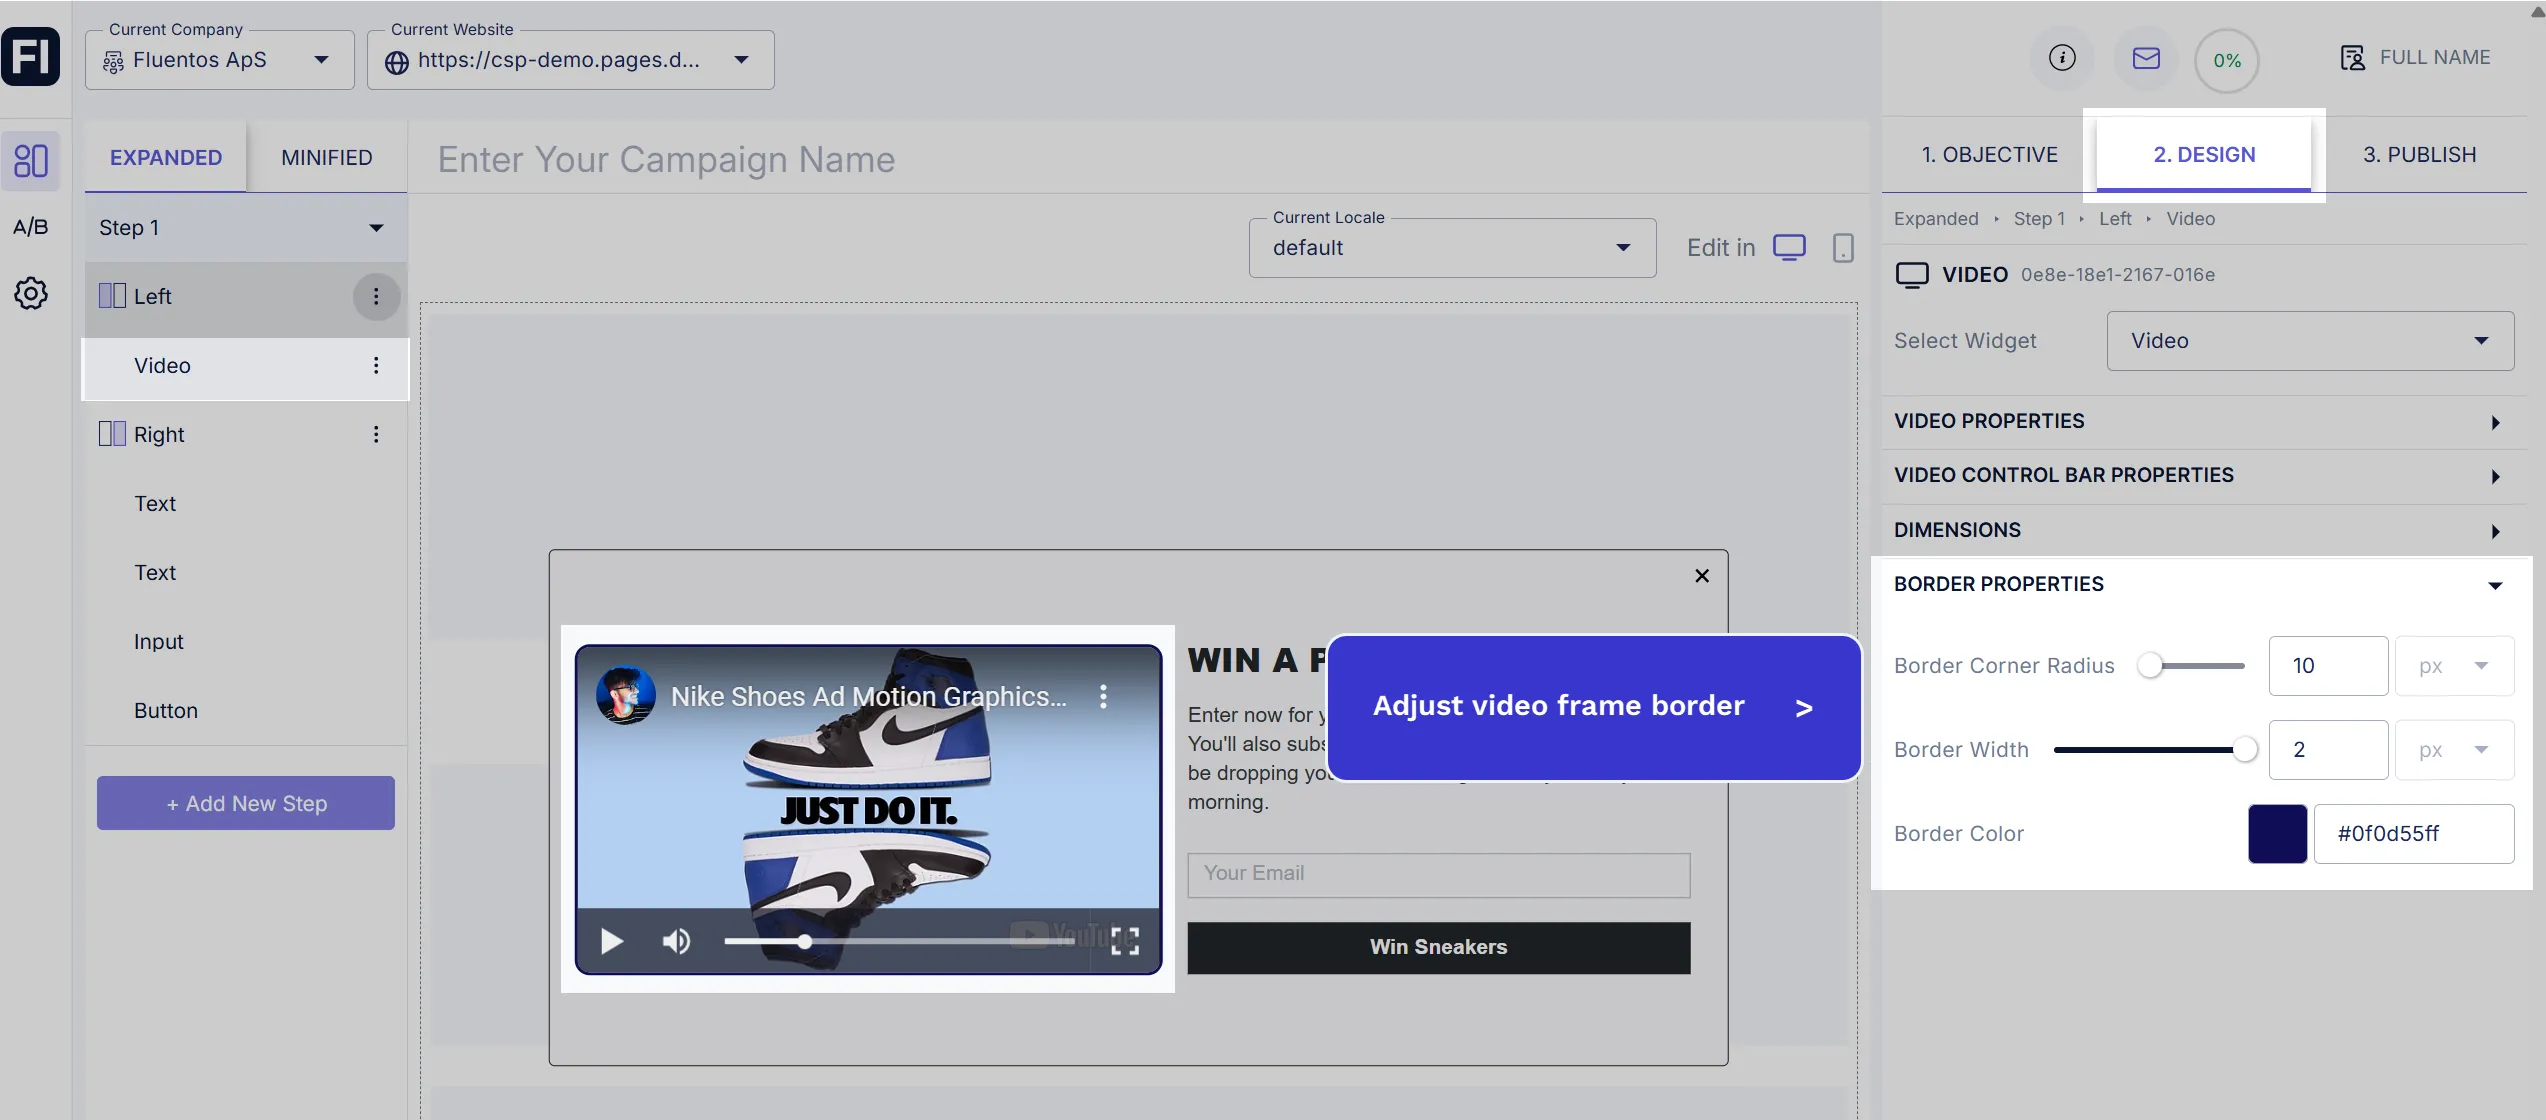
Border Properties
Section titled “Border Properties”You can also add a border to your video frame and customize its roundness, thickness, and color.
- Border Corner Radius: Allows you to set how rounded the corners of the video frame appear. You can choose a value between
0(sharp corners) and100(fully rounded corners). - Border Width: You can set any value from
0 - 2. - Border Color: You can either use the color picker or enter the exact color code in the field to set the video frame border color.