Configuring & Using DataHub
DataHub offers many personalization options for campaigns. It allows you to program the campaign’s appearance based on customer behavior on your website. For example, you can offer free shipping when a customer’s order value reaches a certain value.
Trigger Campaign Based on Datahub Values
Section titled “Trigger Campaign Based on Datahub Values”There are two main parts:
- Push data using JavaScript (this requires some technical knowledge, and your development team can figure it out).
- Adding the keys and their values in the DataHub fields as per the script (this is explained below). Learn more about campaign triggers.
Push Data Using JavaScript
Section titled “Push Data Using JavaScript”The key is always written inside the inverted commas, and the value is defined after the colon (:). Data needs to be pushed on your website as shown in the example below.
fluentosDataHub.push({ 'sale amount': 50 })Setting Up Trigger Based Data Pushed To DataHub
Section titled “Setting Up Trigger Based Data Pushed To DataHub”To define the keys and their values in Fluentos for configuring the DataHub trigger, follow these simple steps:
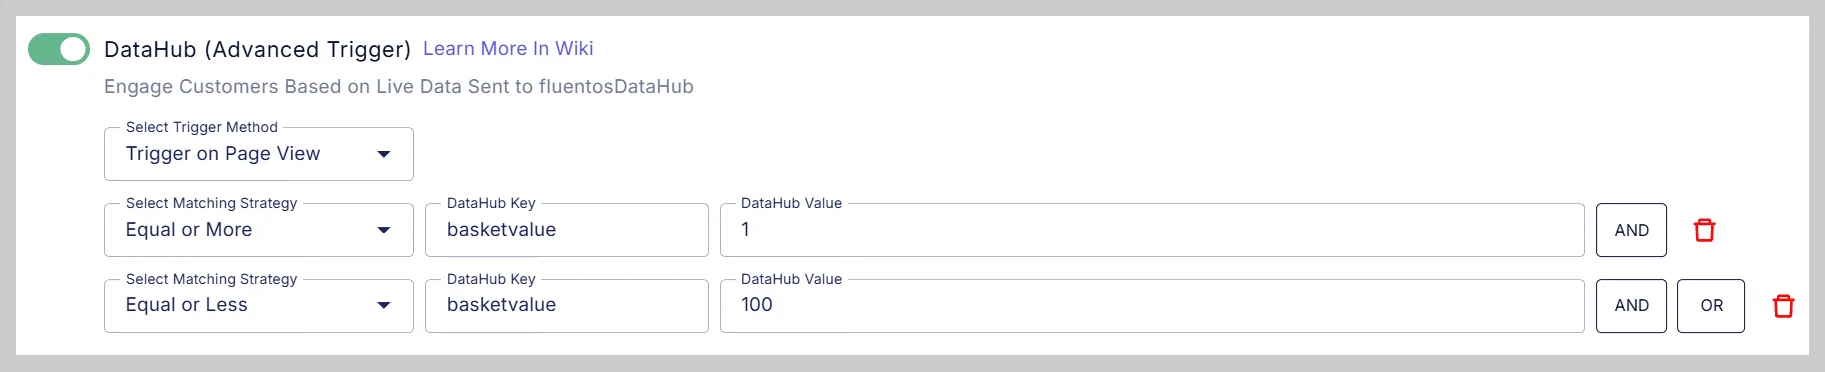
- Enable the DataHub trigger on the campaign’s Triggers page.
- Select the trigger method from the dropdown.
- Select the matching criteria for the key values by using the Select Matching Category dropdown.
- Enter the key name without commas in the DataHub Key field.
- In the DataHub Value field, enter the value for which you want to hook the user and display the campaign.
The two trigger methods for reacting to the DataHub data push are explained below.
-
Trigger on Command: Manually activate the trigger using a JavaScript command. This method is best for scenarios where you need precise control over timing.

-
Trigger on Page View: Automatically activate the trigger based on specific conditions during page visits, such as opening a basket page with a certain total basket/cart value.
Learn more about campaign triggers.
Displaying DataHub Values
Section titled “Displaying DataHub Values”Using the following syntax, you can display the Datahub values anywhere in Fluentos Dashboard; it will just work whether it’s a Text Editor or a Button.
{{datahub:name:fallback value}}- name: it’s the key name for the added value.
- fallback value: used for you to see how it looks in the preview (John in the image below).

Do mathematical operations based on DataHub Values
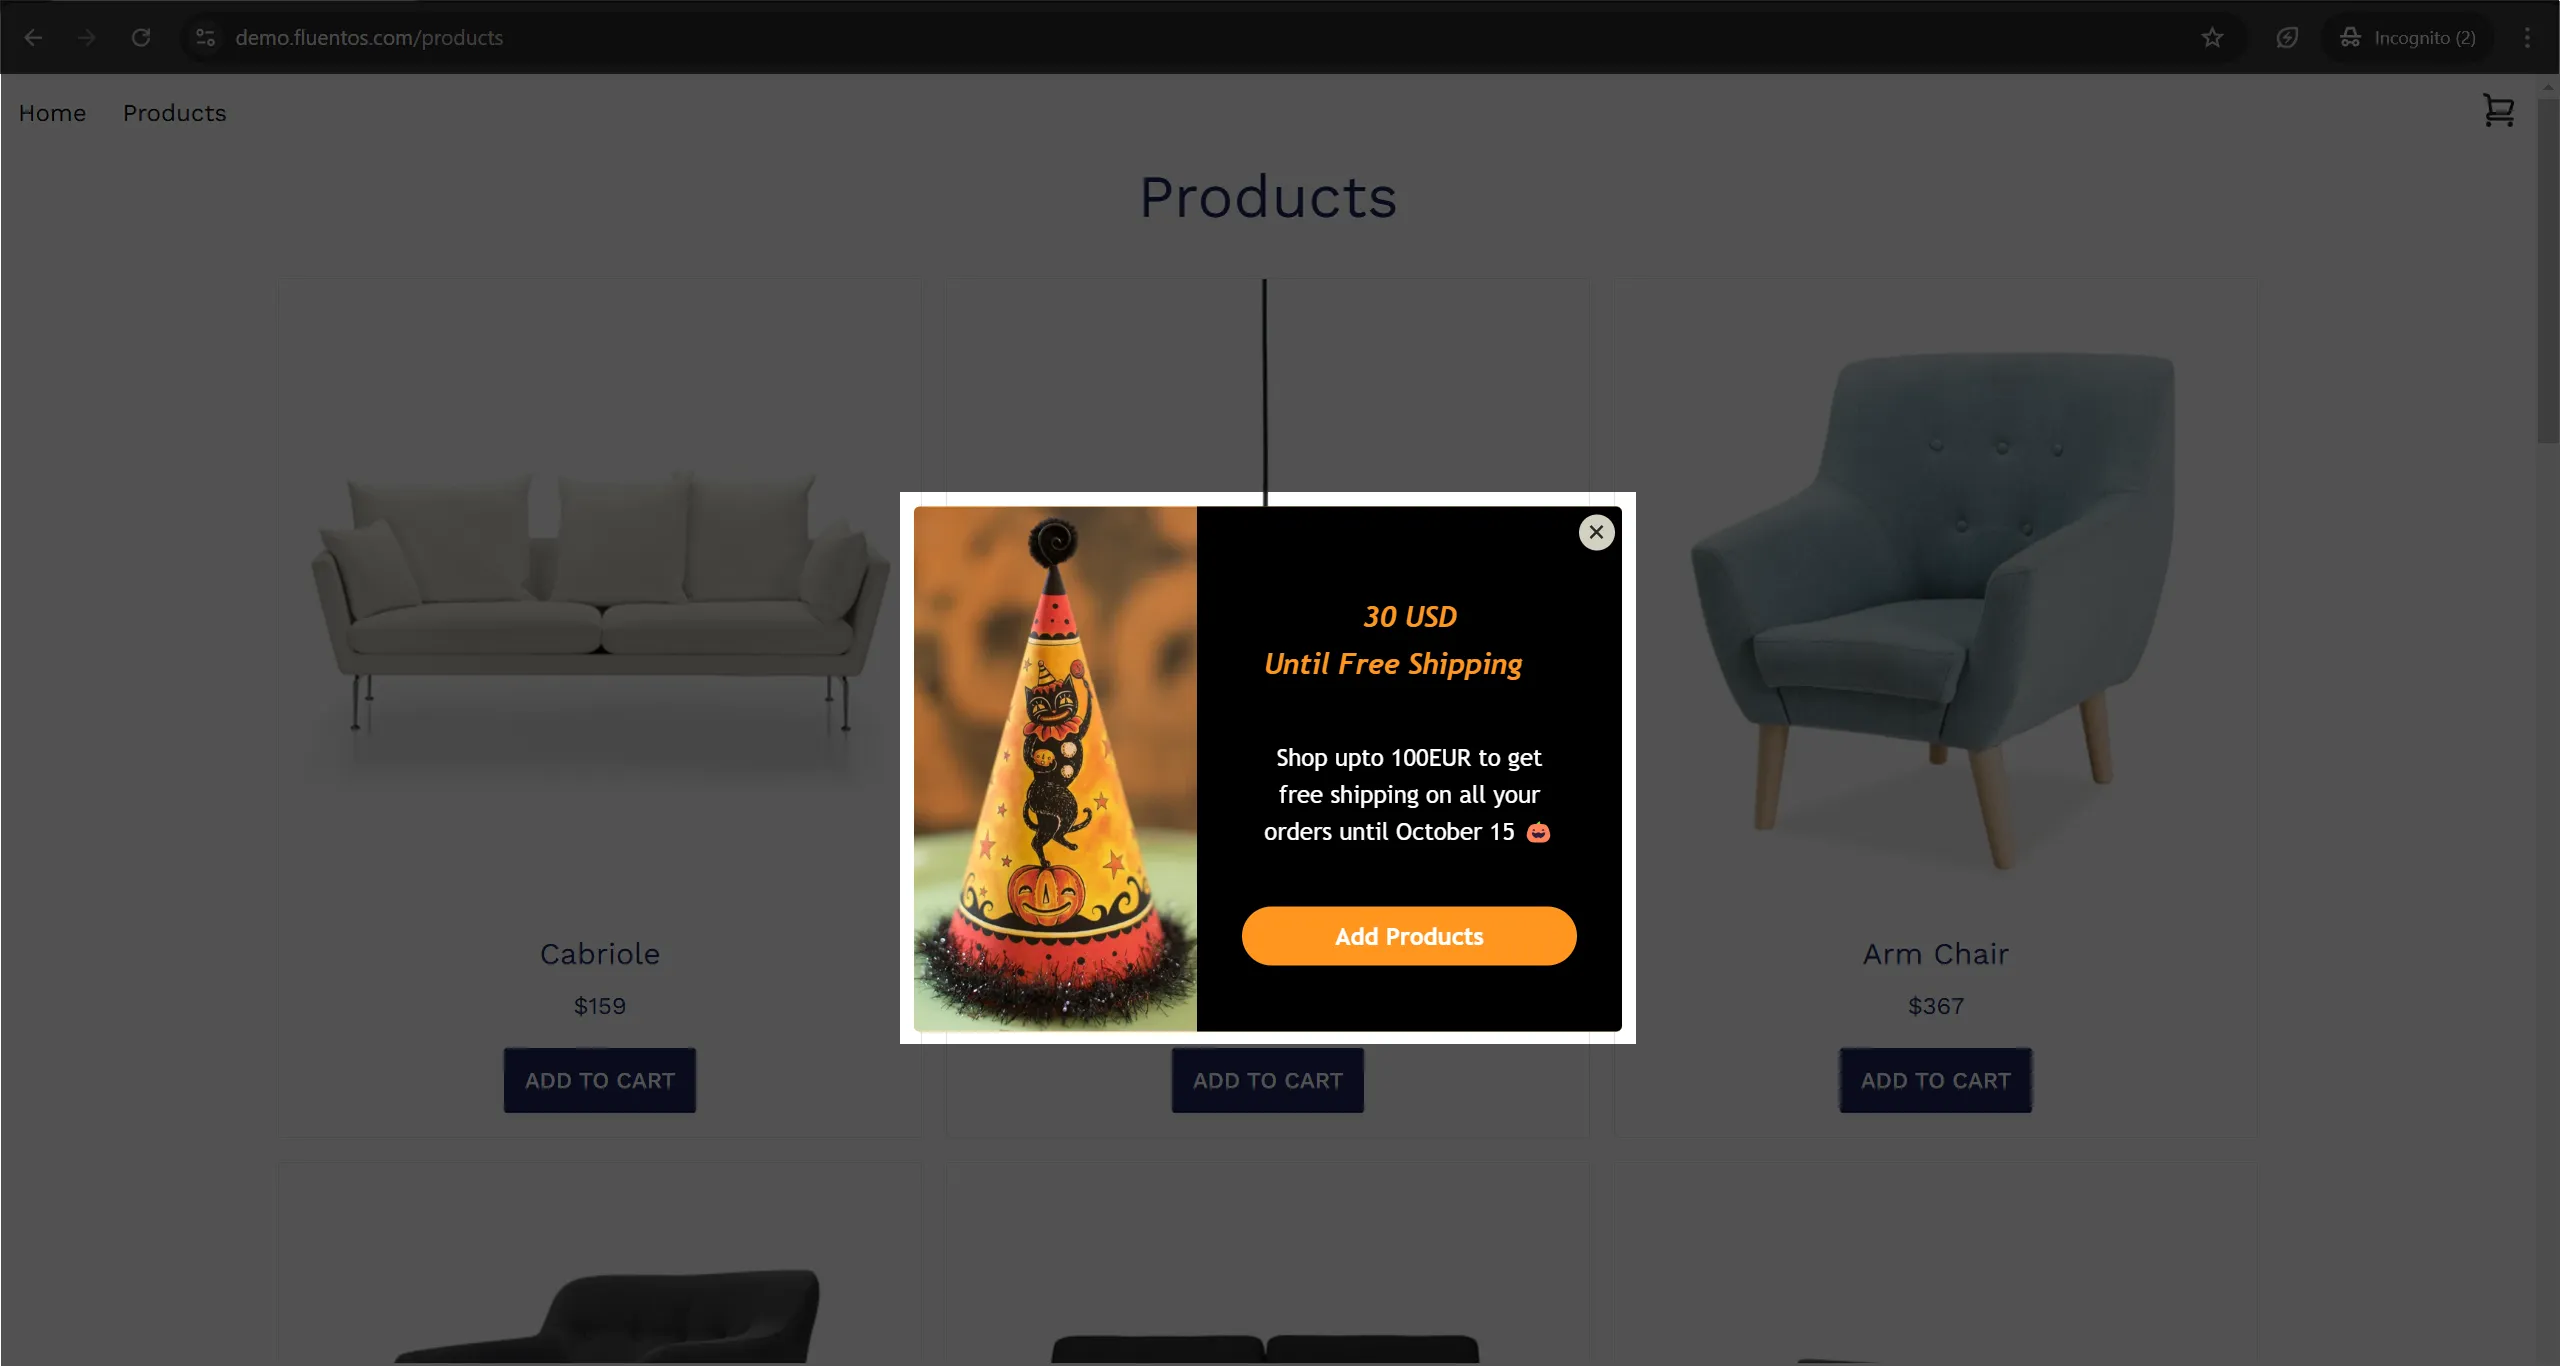
Section titled “Do mathematical operations based on DataHub Values”There are instances when you need to display the calculated values, such as prompting a customer to reach a certain order amount to be eligible for free shipping.
You can use the following syntax anywhere in the Fluentos Dashboard. Whether it’s a Text Editor or a Button, it will just work.
{{datahub:(100 - "basketvalue"):fallback value}}- 100: It’s the maximum value of the range defined in the DataHub trigger. It could be any value that meets your requirements.
- basket value: It represents the value that is pushed dynamically. It should always be written within quotes.
- fallback value: This is used to see how it looks in the preview (20 in the demo case). It is mandatory to mention this; otherwise, the JavaScrip code will be displayed on the campaign.

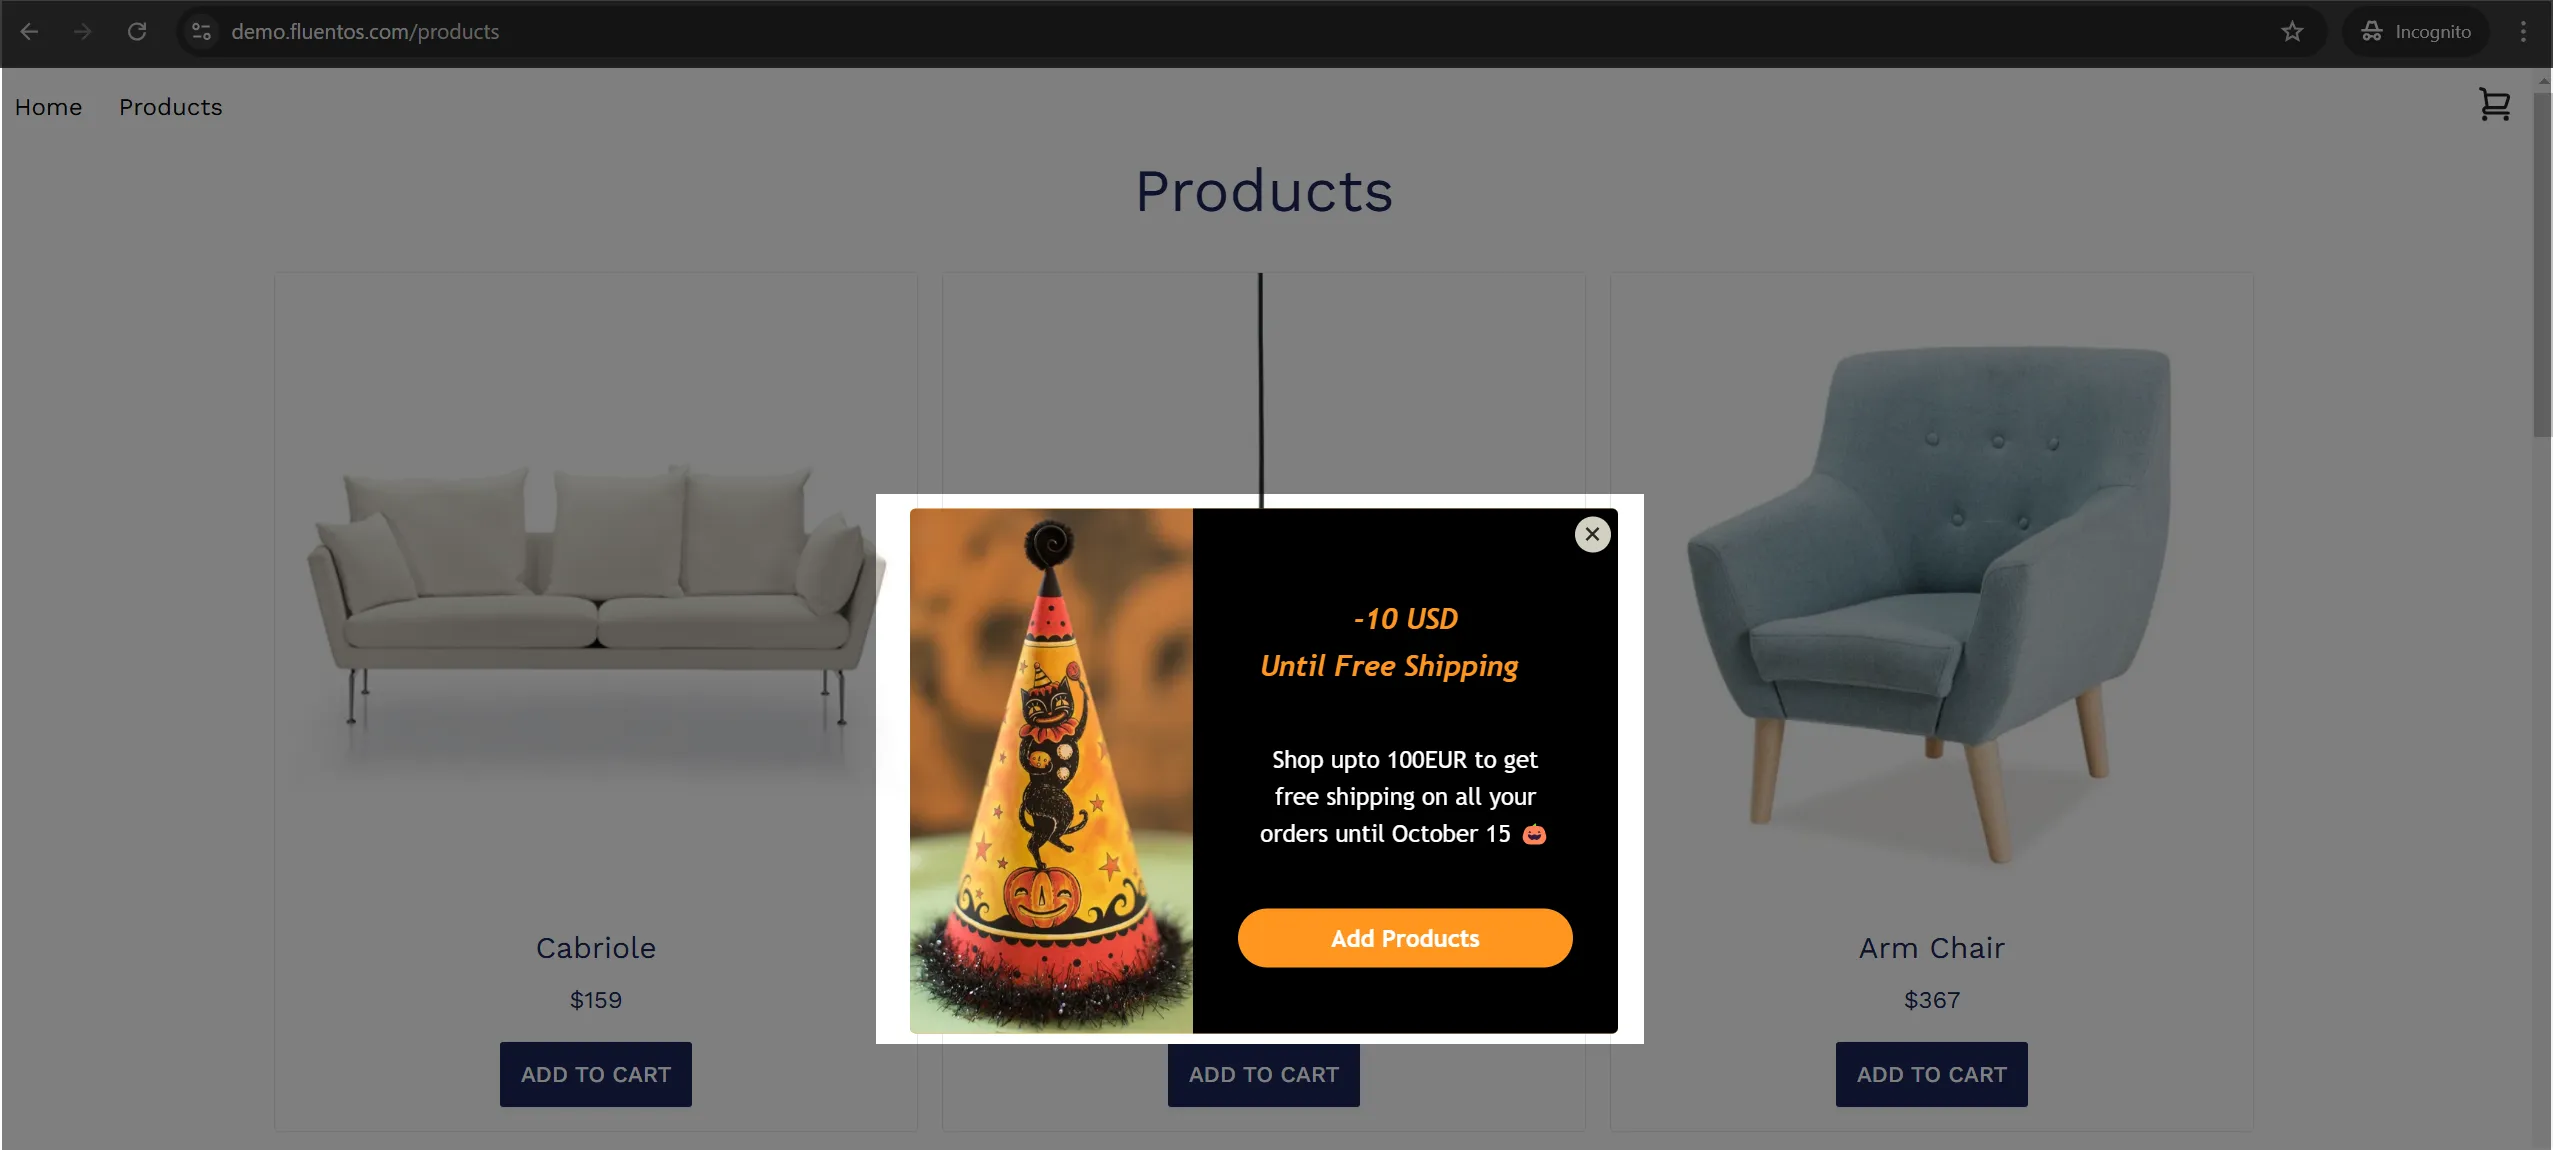
Now, for example, if we stick to this calculation: {{datahub:(100 - "basketvalue"):20}}, where “20” is used as a fallback value, and the user’s cart value is $70, then the campaign will prompt the user to add more products to reach $100 to avail free shipping. The following image demonstrates how the value calculated dynamically will appear.
Negative value
Section titled “Negative value”Your design campaign can display negative values if the trigger settings do not match the formula value in the display code. Let’s try to understand this with examples.
Example 1: Correct Case
In {{datahub:(100 - "basketvalue"):20}}, the maximum value is 100. For this, the trigger settings should be as follows (please see the image shared below).
Example 2: Unwanted Case
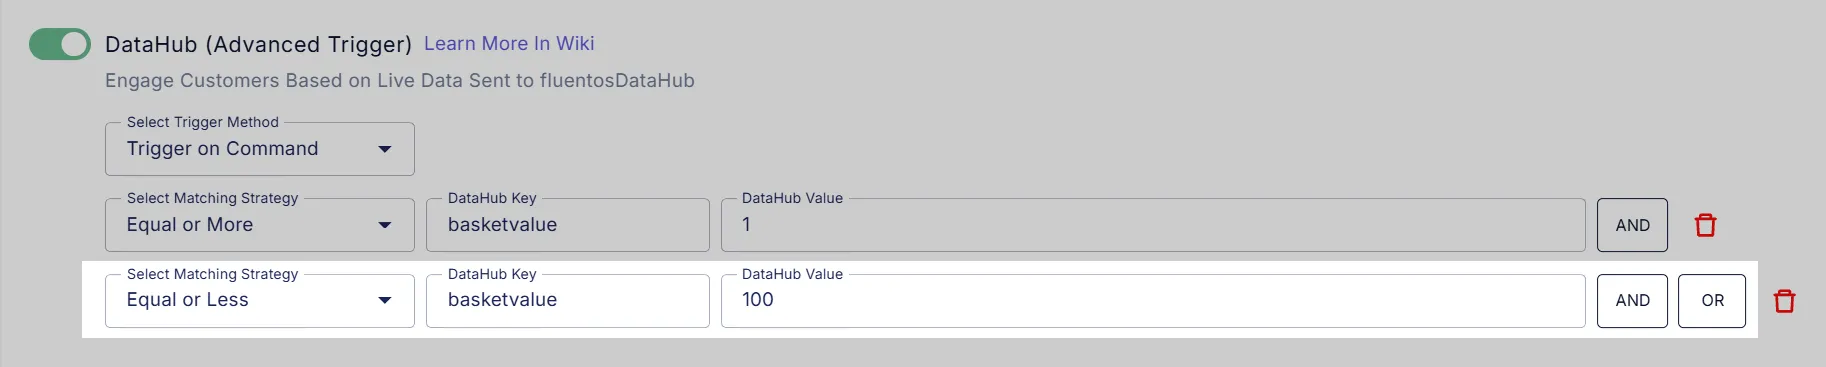
In {{datahub:(50 - "basketvalue"):20}}, the maximum value is 50.
The range defined in the DataHub trigger settings is 1 - 100.
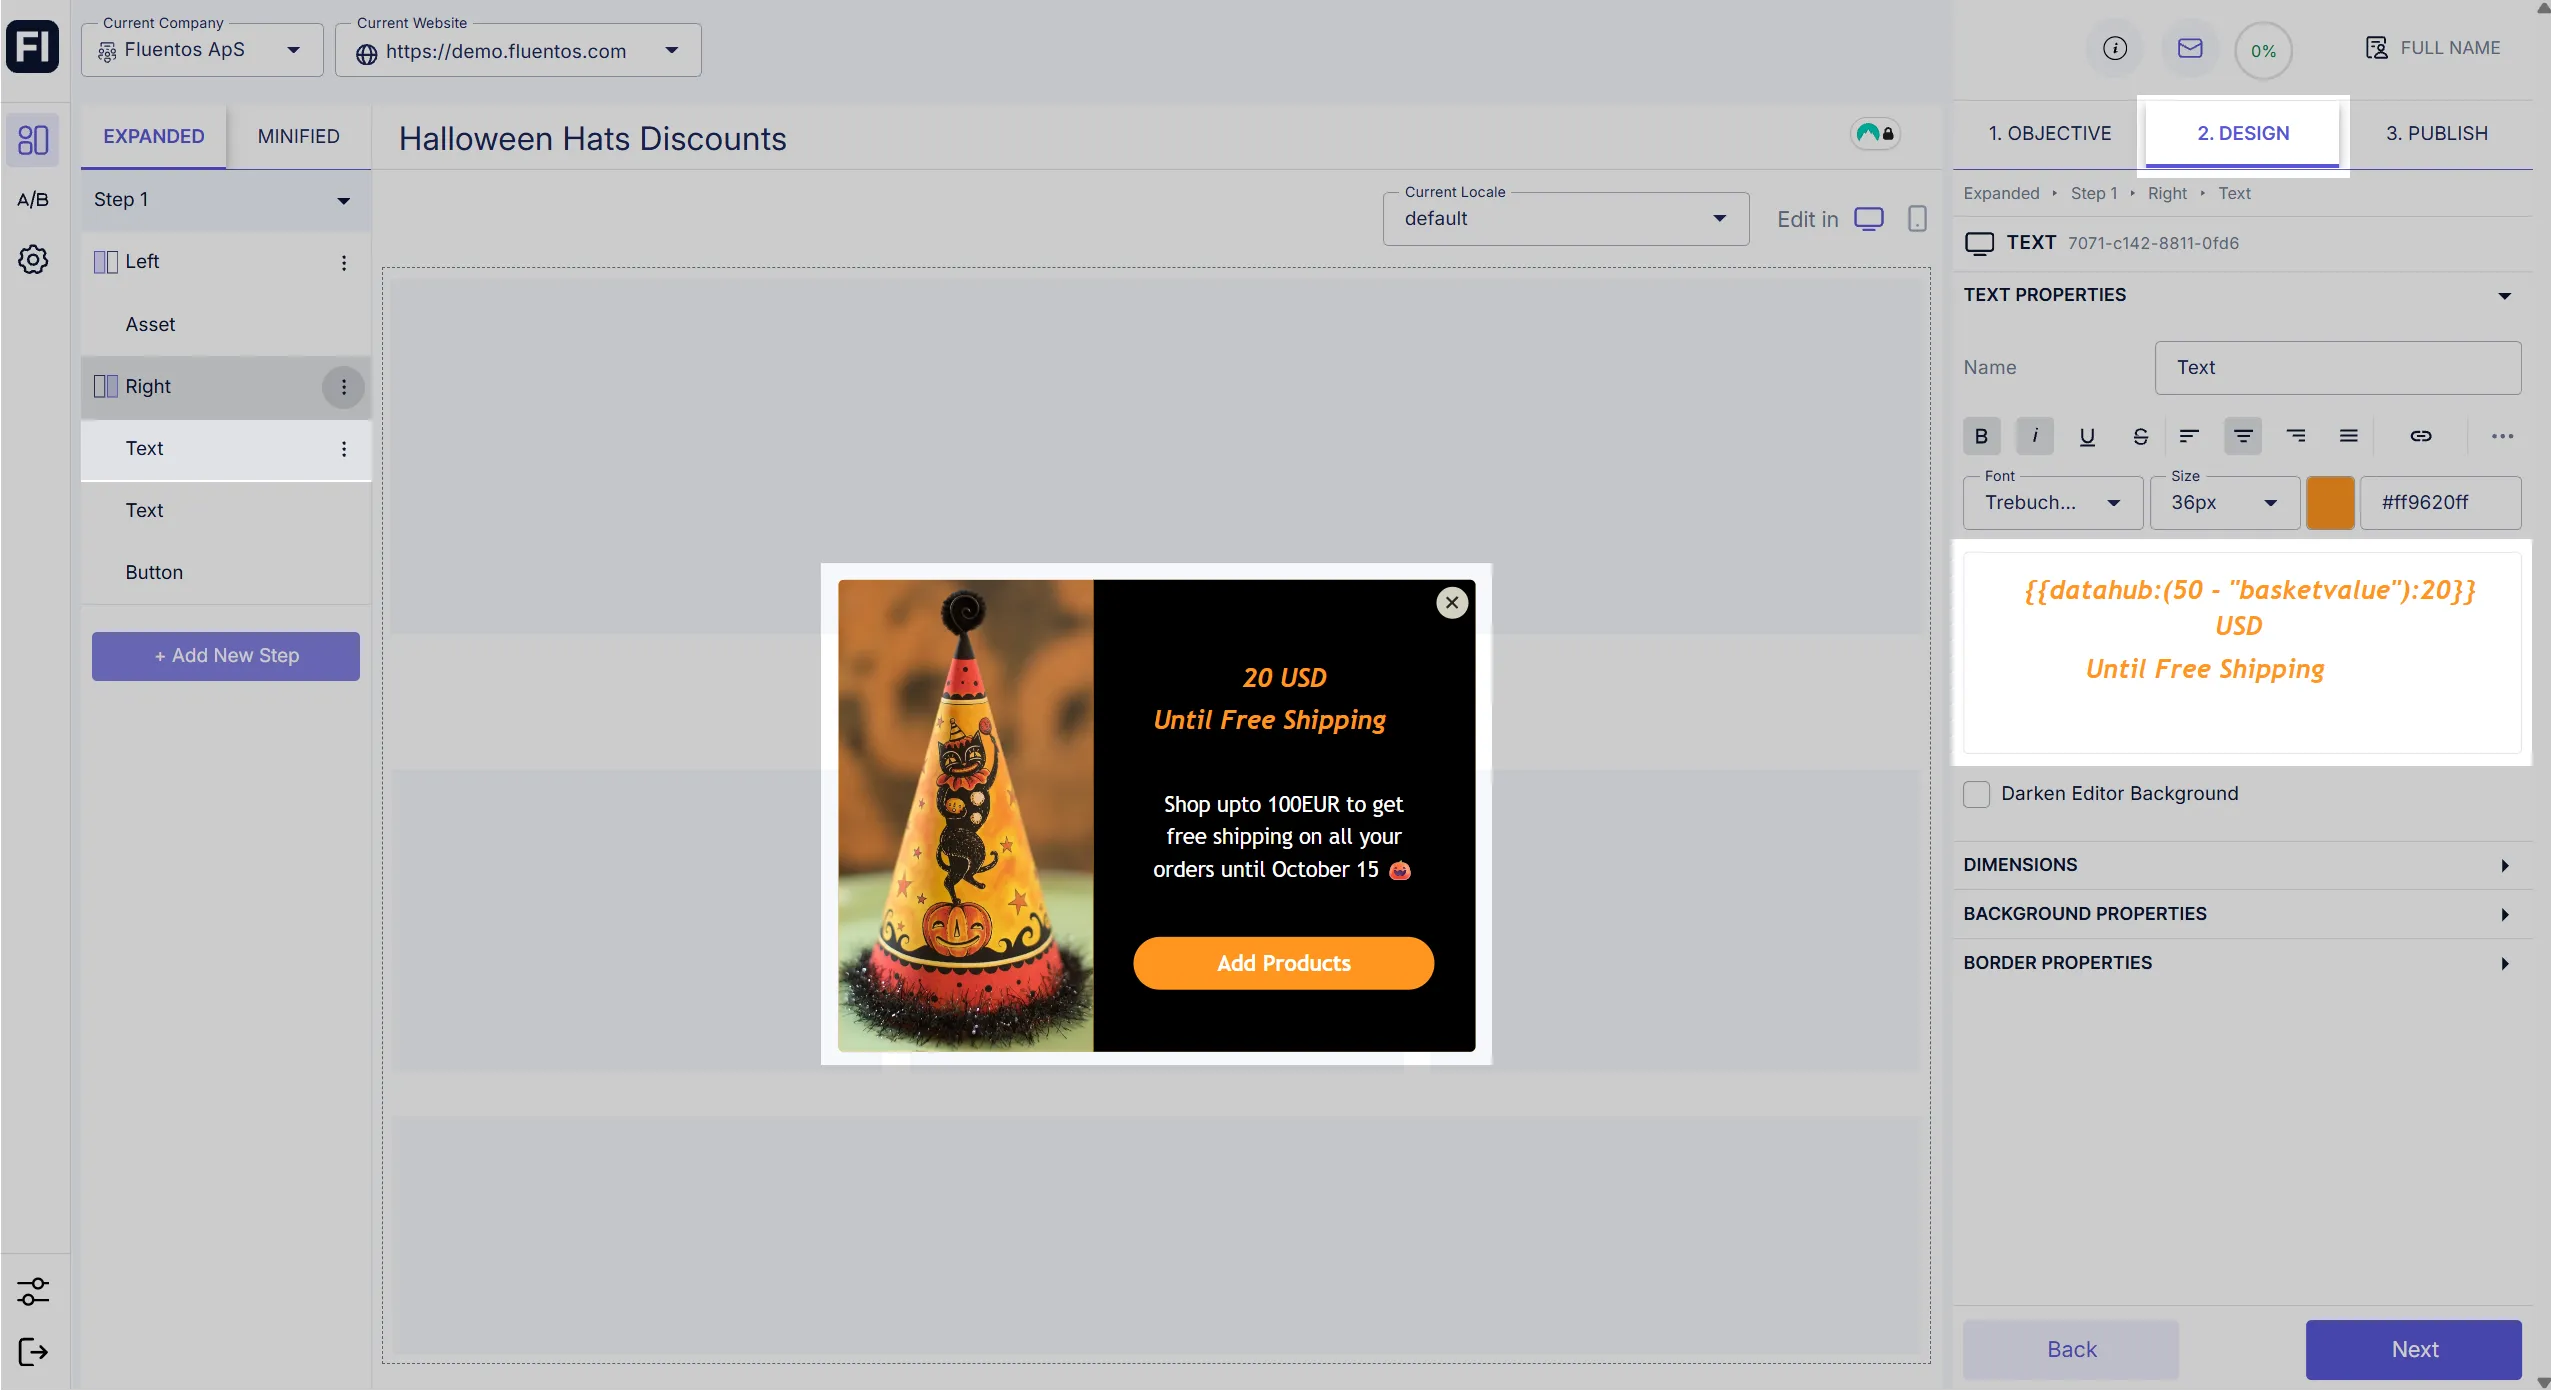
In this case, the campaign will be triggered even when the value 60 is pushed. According to the mathematical calculation, a negative value of -10 will be displayed on the campaign, which is not appropriate.
Using Datahub With Integrations
Section titled “Using Datahub With Integrations”Inside the integration param values, you can pass the following structure to push values from the Datahub to your integration. The “basketvalue” is the available data in the Datahub when the end user submits the campaign.
{{datahub:basketvalue}}Learn more about Integrations.
Data Privacy
Section titled “Data Privacy”Please note that Fluentos does not store customers’ data. All data is stored in end users’ local session storage and is removed when the session ends.